Exciting news – new website!!

Hey everyone, I wanted to let you know of an exciting change for me and that is I have created a new space for my blog and with that comes a new domain: http://www.sweetcaramelsunday.com       I have loved … Continue reading

More Galleries | Leave a comment

Mushroom zucchini spaghetti

So recently I had a craving for mushroom spaghetti and I solved that by making a humongous bowl of it. But then I was thinking, it is fine to have pasta every now and again but it is not a … Continue reading

More Galleries | Tagged , , , , , | Leave a comment

Tomato and feta frittata

I have had a super awesome weekend with today immersing myself in an hour gong yoga class which followed an aerial class. The studio I go to had to move to make way for the new Springfield Library. As much … Continue reading

More Galleries | 2 Comments

Roast chicken and gravy

Am doing a little bit of back tracking here, as I made this meal last weekend but am only blogging about it now. I was looking for a quick and easy well balanced meal with one criteria – I wanted … Continue reading

More Galleries | Tagged , , , , | 6 Comments

Blueberry custard pancakes

What a busy weekend! Australia Day on Friday, so started with a super early walk, followed by yoga then straight up the coast. The traffic was a nightmare with stop start all the way to Bribes – I couldn’t even … Continue reading

More Galleries | Tagged , , , | 4 Comments

Vegetarian lasagne

Howdy folks! I kind of had to make this dish. It was one of the ones where I have had it a few times when other people have done the cooking and have always been delighted but I have never … Continue reading

More Galleries | Leave a comment

Mini mushroom frittatas

This gallery contains 5 photos.

Recipe and pictures of my Mini mushroom frittatas Continue reading

More Galleries | Tagged , , , , , | 5 Comments

Pork and fennel burgers with parmesan stacked potatoes

So what can I say, I got on the trend of these charcoal brioche burger buns this weekend. They are all the rage apparently around the place so thought it would be nice to try something that I hadn’t done before. I admit that I was very sceptical as I am normally a fan of super healthy brown grain bread, but buns made from that can tend to be a bit smaller and not really fit for a ‘burger’. Besides, I actually wanted to see what these tasted like and I think they create such a nice visual effect, that I knew if I mastered these, they could be on the plates for my next dinner party.

Serves 2
Prep time: 20 minutes
Cook time: 10 minutes

Pork and fennel burgers with parmesan stacked potato ingredients

500 grams pork mince
1 tablespoon fennel seeds
1 tablespoon chilli flakes
1 tablespoon garlic, minced
1 large carrot, grated
1 teaspoon ginger power
1 teaspoon white sesame seeds
1 teaspoon black sesame seeds
salt and pepper to season

Pork and fennel burger method 

  1. In a medium sized mixing bowl, add pork, fennel, chilli, garlic and season with salt and pepper
  2. Grate carrot and add to the mix
  3. With clean hands massage spices and carrot into the mince until all of the ingredients are thoroughly combined
  4. Use a large sized cookie cutter to make pork patties, sprinkle sesame seeds onto a small plate and roll patty 360 degrees to get edges coated with a combination of black and white seeds.
  5. Add a splash of olive oil to a fry pan and cook patty each side for about 4 mins, with both sides turning a nice crisp brown colour.
  6. Add the pineapple rings to the frypan and flip to make each side a nice golden colour

Parmesan stacked potato ingredients 

2 potatoes, skin on
40 grams butter
1 tablespoon thyme
1/4 cup parmesan cheese
salt and pepper to season

Parmesan stacked potato method

  1. Use a mandolin to thinly slice each potato
  2. Melt better in microwave heatproof measuring glass
  3. Pour butter onto potatoes
  4. Sprinkle with salt, pepper and thyme
  5. Add a few pinches of parmesan cheese to the mix and stir to combine
  6. Spray a muffin tin with oil, add potato mix, top with leftover grated parmesan
  7. Cook for 20 mins at 180 degrees (until cheese melts and top of stack is golden)

Pickled red cabbage ingredients

1/4 red cabbage
1/3 cup apple cider vinegar
1 tablespoon honey
Salt and pepper to season

Pickled red cabbage method

  1. Finely slice cabbage and add to mixing bowl
  2. Pour over vinegar, add honey and season with salt and pepper

Preparing the burger 

  1. Cut brioce buns, start filling with lettuce, pickled cabbage, pork patty, sweet chilli and pineapple
  2. Take one potato stack and place alongside burger on each plate, serve with freshly cracked pepper

IMG_20180107_162211_527.jpg

IMG_20180106_221438_192.jpg

Burger.jpg

Notes:

  • Most of this meal can be prepped well ahead of time and then when you are ready, make the burgers and serve.
  • The pickled cabbage keeps very well in the fridge for at least a week and this is great for a change to a traditional salad. Plus the pop of colour is nice too.

Enjoy! 


Posted in Dinner, food, Food photography, Home cooking | Tagged , , , , , , | 4 Comments

Very berry bomb smoothie

This is what I like to call my Very berry bomb smoothie – it has mixed berry yoghurt, frozen strawberry and raspberries, apple and black currant juice and ice. Fabulous far to the weekend so far with a bushwalk, delicious home-made brekky with friends  (thanks Katherine and Rob) and yoga.

Got a few projects on the go this arvo, which I am looking forward to. I have also set a new goal this year with an app called ‘Good Reads’. You can set how many books you want to read in a year, so I chose 100 for 2018 and have already crossed one-off so only 99 more to go! So my downtime this year will be spent either in my kitchen, glued to a book or at yoga, that sounds pretty great to me.

Serves 2

Prep time: 10 minutes
Blend time: 4 minutes

Very berry bomb smoothie ingredients

1/2 cup low-fat mixed berry yoghurt
1/3 cup frozen strawberries
1/4 cup frozen raspberries
1/2 cup apple and black currant juice
6 ice cubes

Very berry bomb smoothie method

  1. Start by adding the yoghurt to the blender cup, follow with frozen berries and top with the juice and ice cubes.
  2.  Garnish with fresh strawberries

Berry bomb-1.jpg

Posted in food, Food photography, Weekend | 2 Comments

Lemon and garlic roast chicken with quinoa salad

Happy New Year everyone! I hope that the day has been enjoyable and relaxing. I am super happy to have gone to yoga this morning, 1st class of the year, nice and stretchy but also worked up quite a sweat! … Continue reading

More Galleries | Tagged , , , , , | 5 Comments

Brown sugar glazed ham

Merry Christmas Eve!!

I am responsible for the ham tomorrow, so here it is……….. Brown sugar glazed ham
(And link to my you tube video of my day in the kitchen!)

So happy I took chill time today for yoga, has made me feel chilled and ready for the day ahead…tomorrow. This is our family ham – I did the dish last year as well but with a different combination, more spice this year 🤓 I tasted a wee bit of the glaze from the pan at the end whilst pouring it into a ‘glaze jar and honestly I was like ‘that tastes like Christmas’ -yum!! 👍👍👊☄ Very much looking forward to a long lunch tomorrow and a dip in the ocean as it’s bloody hot here . Hope everyone enjoys tonight ahead of the big day tomorrow and that Santa comes to your place of course!! 🎄🎄🎄 😇

I will come back here and write the recipe steps in more detail, ie the quantities, but like you, I am winding down…..with a few reds soon, so please enjoy the video and see you back here soon.


20171224_12212120171224_12292520171224_145737

P.S Thanks for joining me on my cooking journey with my food blog – Jamchop, Adrianne’s Kitchen this year. It has been very enjoyable to take my favourite hobby, engage with other like minded people and share my love of food and cooking. Your support, dear readers is appreciated 🙂 See you in 2018!

Merry Christmas – ho, ho, ho!

Posted in food, Food photography | Tagged , , , , , , , , , | 4 Comments

Pad Thai

The video of me making this dish is on my you tube channel, you can get to it via this link: Pad Thai

I love Thai food just as much as anyone and I especially love watching them cook it on those weekend shows where they take a trip to Thailand and are having a cooking class as part of their getaway. But I don’t like the rush of takeaway food. You have to order, wait, drive home and then get the plates, utensils and dig in before the meal gets too cold. The style of cooking and food preparation I prefer, is one when you can have a glass of wine, have some back ground noise be it the tv or music, take your time to cook and then enjoy the meal at a slower pace. I haven’t actually had takeaway Thai since I moved out to where I am now, bushland area (which is another reason I don’t get take out, shops are too far away for that!), but my memory of it, is delicious with strong flavours and an orange kind of colour in the container, one that you heat the next day from an oily sludge and indulge again.

In making this dish, I wanted the flavour to still be there, but not too much oil or fats, so that it was a light and fresh meal to suit the climate of sunny Brisvegas of late. The flat rice noodles are nice as you get to have a noodle indulgence, however, they don’t leave you too full or regretting a noodle dish, which I find the thicker yellow noodles sometimes do (especially if you are going to eat the meal and then have the leftovers the next day).

I know that a lot of people use prawns in Pad Thai, I chose not to as I wanted to keep the dish simple and knew that I would be freezing quantities and the chicken mince defrosts and reheats really well, however, adding prawns to the mix in this scenario would have over complicated the dish, which I was not keen on doing.

One of the best things about the meal is the freshly squeezed lime juice, it tastes lovely and is not a flavour you come across when you do more ‘meat and 3 veg’ styles of cooking.

I would highly recommend you give this dish a whirl and don’t forget to give me a shout if you have any questions!


Serves 4
Prep time: 10 minutes
Cook time: 20 minutes

Pad Thai ingredients

1 tablespoon sesame oil
4 eggs, lightly whisked
1 tablespoon garlic, minced
1 tablespoon ginger, minced
500 chicken mince
2 tablespoons fish sauce
2 tablespoons brown sugar
2 tablespoons lime juice
2 long red chillis
2 shallots, chopped
salt and pepper to season
125 grams dry vermicelli noodles
4 shallots, sliced
handful coriander leaves
2-3 limes
pinch granulated nuts

Pad Thai method

  1. Heat wok and when at right temperature (hold your hand over the wok above and you will feel the hot air rising) add the oil and eggs. Season with salt and pepper.
  2. Cook the eggs until they are done, try and cut them with the wooden spoon as you go so that this task is done and doesn’t have to be done separately having set the egg aside. Remove from wok and set aside.
  3. Keep the heat going and add the sesame oil, garlic, ginger and chicken mince, then season with salt and pepper. Break up the mince with the spoon so that it cooks faster and it is cooked thoroughly.
  4. Make the sauce by combining the fish sauce, sugar and lime juice in a medium sized bowl, stir to combine and set aside.
  5. Add the chilli and shallots and then return the eggs to the wok. Pour the sauce in and stir to combine.
  6. In a heat proof bowl add enough bowling water to cover the noodles and stir to break them up. Leave for approximately 4 minutes.
  7. Remove the noodles from the bowl, rinse them and then chop into inch long pieces with kitchen scissors.
  8. Add the noodles to the wok and stir through with the rest of the meal.
  9. Serve with fresh coriander, shallots, nuts and a squeeze of fresh lime juice.

Notes:

*Similarly to my  Chilli lime chicken larb  from the other weekend, I used my wok to make this dish, however, a normal frypan on the stove would be fine too (gas or electric, don’t stress if you have to vary the set up to accommodate your kitchen contents).

IMG_20171118_201825_296

IMG_20171119_164554_374

Eat your heart out xx


Posted in Cooking, Easy meals, food, Home cooking, Uncategorized | Tagged , , , | 2 Comments

Chilli lime chicken larb

I have been wanting to make my cooking even more healthy lately and follow the trends I see like using super foods, like quinoa, more and more veggies and flavours that give zing and zest. In Big W recently, a Donna Hay cooking magazine caught my eye as the front cover image of a burger with green sauce dripping from it looked to die for. So when one of my sisters asked me what I wanted for my birthday I suggested that as I already had a picture of it I could send her and I don’t usually buy things like that on a whim as you end up with too much crap everywhere and I don’t like over cluttering my living space with every possible thing. So my birthday came and I received (gratefully) a copy of said magazine, which I eagerly perused and drooled over. As it was a weekend I was cooking on, I wanted to make something a little indulgent, different from the Monday – Friday, however, still within in a ‘healthy choice’ kind of range. Her recipe for a chicken larb caught my eye so I proceeded down that path, however, I changed the recipe to make it my own as I prefer to make things with my own selection of accompaniments and I knew in blogging about it, I didn’t want to plagiarise anyone else’s work (no originality in doing that!).

Before leaving my folks at the coast to come back to Brisvegas, mum and I had taken a tour of her veggies garden where she loaded my up with some lovely greens – basil, shallots, mint, chives, all good things,that I couldn’t wait to add to this dish.

The recipe called for a Lime Vinaigrette which I did use this time and would use next time if in a hurry as super convenient and flavour is quite nice, however, as I like to know what is going in my foods, I think making it from scratch would be simple and easy enough.

It is so nice to be super chilled and relaxed at the moment, no stressors, putting my feet in the ocean up at Bribes and watching the sunset with mum, really makes you breathe at a slower pace, unwind and regroup all to face another week!


Chilli lime chicken larb
Serves 4
Prep time: 10 minutes
Cook time: 15 minutes

Chilli lime chicken larb ingredients

1 tablespoon olive oil
1 tablespoon garlic, minced
1 tablespoon ginger, minced
500 chicken mince
1 bunch fresh chives
½ cup lime chilli vinaigrette
1 tablespoon fresh minced chilli
salt and pepper to season
100 grams dry vermicelli noodles
1 lebanese cucumber, thinly sliced
4 shallots, sliced
handful mint leaves
handful basil leaves

Chilli lime chicken larb method

  1. Heat wok and when at right temperature (hold your hand over the wok above and you will feel the hot air rising) add the oil, garlic and ginger
  2. Add the chicken mince and start to cook, breaking up any chunks as you go with a cooking utensil
  3. When the mince is near cooked (as there are very few pink bits left) add the vinaigrette
  4. Add the fresh chili, continue cooking, till meat is fully done, add the chives and stir in, for no longer than about 2 minutes
  5. Once the larb is done, prepare the noodles, by placing them in a heat proof bowl and pour enough water over them to cover, leave for about 4 minutes, use a fork to help separate
  6. Slice the cucumber and other greens for garnishing
  7. Rinse the vermicelli noodles, portion into serving plates and top with the larb
  8. Add cucumber and additional garnishes, top with a drizzle more of the vinaigrette and some granulated nuts.

 20171112_154330


20171112_154631


Notes:

*Video is also available on my you tube channel > Chilli lime chicken larb

*I like using the wok for this dish as it is super speedy, stove top either gas or electricity would also be fine (ie don’t go out and buy a wok just because you don’t have one, there is no need for that).

Eat your heart out xx


Posted in Cooking, Dinner, Easy meals, food, Food photography, Uncategorized | Tagged , , , , , | 5 Comments

Honey soy garlic stir -fry


I love making stirfrys. I find them, quick, easy and delicious. I bought a wok years back now and during the warmer months love spending sometime thinking about which veggies I want to have and what sauce combination. The last few I have made, I have also added some cooked quinoa, I think this really adds texture and bulks the meal up a bit especially if I am not planning on using rice to serve it with. Another great thing I find is that it freezes very well.This means I can make a dish on the weekend, portion it out into meals and then freeze so that for week nights when I get home and go to yoga I can have dinner ready for me when I get back at the touch of a button. Sometimes I will put some vermicelli noodles with the dish or rice, or just greens depending on what I am feeling like at the time. Whilst I am not opposed to a frozen meal as we all know time is sometimes against us, I would much prefer it to be something I have cooked than someone else’s cooking (knowing exactly what is in it).

My advice to anyone cooking a stir-fry is to prep everything before cooking. That way the actual cook time will be super fast and you won’t have to adjust the heat too much during the process. Sometimes I use a wok, other times I use a frypan on the stove, both work well. The benefit of the wok is that all of the ingredients will cook quickly to a uniform consistency, whereas if you use a frypan, you have to allow for a less even heat, which can make different veggies cook at different speeds (a problem you don’t have with the wok). But then I guess the downside to the wok is extra cupboard space, bench space and can’t go through the dishwasher (I’m not a fan of cleaning up, never have been and never will, give me a dishwasher everyday and I will do my best to stock it to the top, shoving everything I can into it). I make no apologies for this, we are all good at some things, bad at others, cleaning in the kitchen is not my strong point or my forte (nor is carving poultry, but I persist regardless, hoping one day I will get there).

What you will see for this dish is that I got everything and I mean everything ready that I knew I would need. This is the best process for quick and easy cooking. You don’t want to have to stand at the cupboard and bob up and down whilst looking for the salt whilst the garlic is burning the pot till it is black (the dishwasher doesn’t get that kindof mess off things be warned!).

There is a restaurant I love going to called Mongolian BBQ. It is not fancy, but it serves amazing food. You get to have lots of veggies, thinly sliced meat, lots of Asian flavours in the sauces and best thing is that they cook it for you whilst you watch. You literally fill your bowl with everything you think you can eat, put all of the sauces in and hand it over, one of my all time favourite dining experiences. I think because it reminds me of the time I lived in Japan where we would often have Korean BBQ for dinner or on the weekends, I reminisce. Anyhoo, here is my Honey Soy Garlic Stir fry receipe, enjoy!


Serves 4
Prep time: 20 minutes
Cook time: 10 minutes

Honey Soy Garlic Stir-fry ingredients

1 tablespoon peanut oil
1 tablespoon garlic, minced
1 tablespoon ginger, minced
500 grams pork and veal mince
2 tablespoons soy sauce
1 tablespoon hoisin sauce
1 tablespoon honey
1 tablespoon sesame seeds, toasted
salt and pepper to season
2 cups peas, thawed
2 red capsicums, thinly sliced
½ bunch shallots, chopped
2 cups mushrooms, sliced
1 cup quinoa, cooked
4 bunches vermicelli noodles

Honey Soy Garlic Stir-fry method

  1. Cook the quinoa to begin with. Take ½ cup of the dry grain and boil on the stove top in one cup of water, until the liquid is absorbed, then set aside.
  2. Start by turning the wok up to cooking heat (medium to high setting) and add the oil
  3. Follow this with the garlic and ginger, then add the mince to the wok, then season this with salt and pepper
  4. Cook the meat thoroughly, ensure there are no clumps and no pink bits visible
  5. Add the peas, mushrooms, soy, hoisin, and stir continuously
  6. Add the capsicum, quinoa, honey, sesame seeds and shallots, stir to combine, then turn wok off
  7. Put 4 bunches of vermicelli noodles into a heat proof bowl and cover with boiling water, leave for 2 minutes, stirring with a fork to separate the noodles
  8. Serve with fresh spinach leaves, vermicelli and crushed peanuts

Notes

*Tricolour or white quinoa, either will do, whatever you have on hand.
*Toast the sesame seeds in the microwave before starting to cook, start with a minute and work up till nicely brown to ensure you don’t overcook ie don’t start with 3 minutes and then smell that you have burnt them and then realise you should have started with a lower time. I have done this many a time and learnt from these experiences not to overcook my nuts.
*There is a video of how to make this stir-fry on my instagram feed, you can get to it by clicking on one of the images to the right of this page in the insta gallery.

 20171105_160450

Eat your heart out xx


P.S If you have questions about any of the recipes on my blog, I would love to hear from you, please fill in the form below and I will get back to you.


Posted in Cooking, Dinner, Easy meals, Home cooking, Vegetables | Tagged , , , , , , , , | Leave a comment

Haloumi and greens with fried egg

Breakfast on a weekend is one of my favourite meals. There is not the rush of the working morning and I like to take more time to prepare my meal and sit and enjoy it, as opposed to the usual … Continue reading

More Galleries | Tagged , , , | 4 Comments

Tri-coloured buttercream cupcakes

So this last weekend was wet in Brisvegas, like do not leave home, do not drive a vehicle, stay in, enact wet weather plan and do stuff that you normally don’t get time to do. One of the things I … Continue reading

More Galleries | Tagged , , , , , | 4 Comments

Mushroom and Spinach Risotto

I feel like I have been playing the game of pac man recently where the dots are my time and the dot munchers are everything except things which really allow me to relax and recharge away from the Monday – … Continue reading

More Galleries | Tagged , , , , , | 2 Comments

Carrot Cake with Cream Cheese Frosting

I had been wanting to find a new receipe for a carrot cake that I could master and have with me ongoing and I was delighted to realised I had achieved that with this winning combination. I feel that carrot cakes can be a bit hit and miss and over the years with the ones I have tried I have been happy enough but never consistently so. Either the cake was too dry or didn’t have any walnuts or had pineapple or was too store made tasting so I kept searching. I have used receipes from many different websites and tried packet mixes when time didn’t permit and this one is a modified version of one I came across on the back of the cream cheese block from Aldi (favourite shop of all time!)

The cake is delicious, definitely not dry, has enough carrot and walnuts to satisfy any critic and no pineapple! (Although I think the receipe did suggest to add it, however, I wisely chose not to). I whipped this up in a few hrs on Wednesday night just gone post yoga, but there are minor changes that could be made with more time (eg putting the cake in the fridge after adding the frosting to the centre of the 2 cakes to have it set a little before frosting the rest of the cake). However, those things are much of a muchness so if you were super pressed for time, it is still achievable in a short period. I had bought a new turntable recently from the cake store at Darra and this enabled me to try it out but spinning it around when I was icing the cake, albeit at a slower pace when the cake was on top as opposed to cakeless as a colleague and I giggled about this week!

I was surprised at 1st when I read this recipe as it has a lot of sugar and I was skeptical as it is caster sugar not brown sugar which I knew had traditionally been used in carrot cakes, however, my mind was made up when I tried the cake and didn’t experience an overly sugary mouth full nor did I think brown sugar would have tasted better in the end!

So I made this for work and we had it for morning tea and I think the general consensus was that it tasted delicious so I am a happy cook!!


Serves 8-10
Prep time: 20 minutes
Cook time: 55 minutes
Decorating time: 15 minutes


Carrot cake ingredients (x2 for 2 cakes)

200 grams plain flour
295 grams caster sugar
1 ¼ tsp bicarb soda
1 tablespoon cinnamon
½ packet walnuts, coarsely chopped
167ml vegetable oil
2 eggs, free range
1 teaspoon vanilla extract
2 medium sized carrots, grated

Cake method

  1. Preheat oven to 180 degrees and 2 x 8 inch cake tins with butter and baking paper
  2. In a mixing bowl, combine flour, sugar, bicarb, cinnamon and vanilla, stir to combine
  3. In a glass measuring cup add oil and eggs and prick with a fork and combine
  4. Pour liquid mix into dry mix and use hand held beaters to mix
  5. Add carrot and walnuts and stir till thoroughly combined
  6. Cook for 55 mins until a skewer inserted in centre comes out clean
  7. Toast coconut chips towards end of cooking time for 10 mins unless lightly browned

For the frosting I modified a version I found on www.bestreceipes.com.au as I knew with the 2 cakes and filling, I would need more frosting than my normal go to 60 gram standard receipe.

Cream cheese frosting ingredients

600g icing sugar, sifted
100g unsalted butter, at room temperature
250 gram block of cream cheese
1 tablespoon lemon juice
1 teaspoon vanilla essence

Cream cheese frosting method

  1. Beat the butter and icing sugar with a handheld beater
  2. Add cream cheese, lemon juice and vanilla essence and mix in well till frosting is light and fluffy

Decorating method

  1. Cut the top ‘round’ part off both cakes and discard
  2. Place one cake on a cake board and top with 1 cm frosting across the top
  3. Turn 2nd cake upside down and place on top (put in fridge for 30 mins if time permits)
  4. Use a flat spatula to spread remaining cream cheese on top of cakes and down all sides
  5. Top with toasted coconut chips


1502607035959150260706776815026071441071502606966691

Enjoy!! xx


Posted in Baking, Cooking, DIY, Down time, food, Food photography, Home cooking, Uncategorized | Tagged , , , , , | 1 Comment

Breakfast muffins

A long time ago now, I made some spinach, feta and sun-dried tomato muffins. They were good, but the recipe was complicated and recommended frozen spinach instead of fresh (I much prefer fresh as find frozen to be dry and lifeless) and buttermilk which meant I would use a small amount and then have the rest in the fridge which I would no doubt throw out at some point as I didn’t have anything else in mind to use up the remainder of the liquid. Fast forward a few years and I have used many different recipes to make a similar version of the same, albeit usually changing or modifying things ever so slightly as I didn’t feel I had perfected the recipe yet. After much internet research over time (usually procrastinating from the task at hand), I came across a Julie Goodwin recipe for Cheesy Lunch muffins which I made and I was very satisfied with the results, I felt she had hit the nail on the head when it came to making delicious savoury muffins. Despite her recipe being simple and very tasty, I still wanted to modify it slightly to suit my grocery preferences ie never having cow’s milk at home (I found I wasted to much of it as it went off faster than I used it) these days and using almond milk in its place. I also wanted to season the ingredients well prior to cooking and use gluten free flour for a change (I am not gluten intolerant, but I think this receipe works best with gf flour). So in the end, the recipe below is the one I have come to rely on the most for savoury muffins and they are absolutely delicious.

In the years back ones, I used feta cheese which I enjoyed, however, I don’t have it in the fridge as often as I do grated cheese and have to put it on my shopping list and therefore be quite prepared in advance if I want to make these muffins. However, with the Julie Goodwin version of the same recommending grated cheese, I found that I can usually whip up a batch of these without having to get any extra ingredients to the ones I already have in my fridge and pantry.

That is a winner in my book as it means that it can be a last minute option or an option when you feel like doing a bit of cooking, but don’t want to have to pop out to the shop to get the missing ingredients.

One of my colleagues and I were talking about food this week and throughout the course of a couple of hours, it was her idea from our conversations to think about a caramelised onion relish. It didn’t take long for my mouth to start watering as I was thinking about how well that would go with the muffins I had in mind as I looked at the tomato relish in the jar on the computer screen in front of me, I knew I would definitely prefer to make my own than to buy store bought relish. Plus I had very recently made caramelised onions and the ingredients and process was at the forefront of my mind so I knew it wouldn’t take long. I didn’t however, want to use just a batch of caramelised onions as the sauce and pondered for a bit to come up with a relish idea – adding fresh minced chilli was my brainwave and I was definitely pleased this morning to try it out and knew I had made the right choice.

I wanted to make ‘texas’ muffins for a change so instead of using a normal muffin tin, I made 6 large ones instead and one muffin was definitely enough for a meal (although I might have snuck in a bit more later as I wanted to revisit the flavours (they are that good!). This recipe is super easy, you stir it together so not too much washing up from beaters etc and I challenge you to not sit on the ground in front of the oven watching the muffins cook as I always find myself doing whenever I have something in the oven.

Do give these a whirl, you won’t be disappointed and you won’t likely ever order one out again as it won’t compare to the deliciousness of this recipe!


Serves 6
Prep time: 15 minutes
Cook time: 30 minutes

Breakfast muffin ingredients

2 cups gluten free self raising flour
1 ½ cups grated cheese
3 eggs
½ cup almond milk
60 grams butter, melted
1 can corn kernels, rinsed
150 grams spinach
100 grams sun-dried tomatoes
salt (to season)
pepper (to season)

Muffin method

  1. Preheat oven to 180 degrees and line a texas muffin pan with 6 baking paper inserts
  2. Combine flour and cheese in a large mixing bowl and season with salt and pepper
  3. In a small bowl add eggs, whisk to pierce yolks, pour in milk and melted butter
  4. Using a food processor finely chop the spinach and sun-dried tomatoes and add them and the corn to the miking bowl
  5. Pour in the liquid ingredients, stir till the mix is thoroughly mixed together and portion out into muffin cups

Caramelised onion relish ingredients

2 large red onions
1 tablespoon garlic, minced
¼ cup balsamic vinegar
2 tablespoons brown sugar
1 teaspoon red chilli, minced

Caramelised onion relish method

  1. Put a splash of olive oil into a saucepan, add garlic, onions, salt & pepper, fry for 3 mins
  1. Add sugar and vinegar to pan, stir and simmer for 5 mins until onions are vibrant in colour
  2. Add chilli and simmer for 2-3 minutes
  3. Turn stove off, pour ingredients into bowl, chill in fridge to cool, add to food processor and blend to combine.


1498870344800 The bowl is one of the few things you have to wash up after cooking (thank god for dishwashers!)

1498870322379

You can easily make the muffin wraps with baking paper, then put a jar or tin in each cup so they paper sits in place firmly when you are scooping the mix into the pan.

1498879339241

Fresh from the oven and the house smells amazing, eating them when hot is best!

1498870298137

Shown here with the relish, the chilli gives a nice balance but the sugar in the mix means the relish is sweeter rather than spicy – yum!!

Enjoy!! xx


Posted in Baking, breakfast, Cooking, Down time, Easy meals, food, Food photography, Home cooking, receipes, Vegetables, Weekend | Tagged , , , , , , , , , | Leave a comment

Caramelised Onion and Feta Tart

My friends, Emily and Tim had given me a Bill Granger cookbook (Best of Bill The Ultimate Collection of Bill Granger’s recipes) for a present a few years back and I have been drooling over this tart recipe ever since. I finally got around to making it this week and I am so glad that I did as the combination worked a treat and it was full of flavour! I modified the recipe from the original as I wanted to use rocket plus I also wanted the feta to be slightly melted as opposed to the version in the book, where you top the tart with feta after taking it out of the oven.

I know that the option of ‘Meatless Monday’ is popular these days and I try to stick to that as a plan each week by having a vegetarian or vegan option to start the nights of the working week off. This was a perfect choice for that.

I was surprised how filling the tart is as it doesn’t have a lot of bulk to it, but it was very satisfying.

Brisvegas is doing this thing where it is a little bit cold then warms up, then gets cool again, it is hard to keep up. A tart seems like the perfect cold, but not freezing comfort food.  The best thing is the sun is usually always shining, thank goodness!

So I haven’t started doing soups to soothe the winter blues yet, but I think that is on the cards in the next few days, stay tunes and have a great weekend!

Caramelised Onion and Feta Tart Ingredients
Serves 2
Prep time: 15 minutes
Cook time: 30 minutes

2 sheets puff pastry, thawed
3 large red onions, sliced
1 tablespoon garlic, minced
125g greek feta, cut into cubes
handful fresh rocket leaves
sprinkle grated parmesan
1 tablespoon olive oil
2 tablespoons brown sugar
1 tablespoons balsamic vinegar
salt
pepper

Caramelised Onion and Feta Tart Method

  1. Preheat oven to 180 degrees
  2. Put a splash of olive oil into a saucepan, add garlic, onions, salt and pepper, fry for 3 mins
  3. Add sugar and vinegar to pan, stir and simmer for 5 mins until onions are vibrant in colour
  4. Lay pastry onto baking paper on a flat tray and roll edges of pastry in to form a crust, then pierce with a fork all over
  5. Top pastry with onions, use a pastry brush to coat crust with olive oil
  6. Take out of oven and spread rocket and feta on top of onions, sprinkle parmesan on top and bake for another 10 minutes until pastry is a light golden in colour


Caramelising the onions in the saucepan

Adding the toppings to the pastry

Fresh from the oven!

Listen for the crunch when you cut into the pastry!

Enjoy xx


Posted in Cooking, Dinner, Home cooking | Tagged , , , , , , | 2 Comments

Thai red curry pork meatballs with capsicum and spinach

It has been a bit colder in Brisvegas lately. As such, I have been thinking of comfort foods that are a little bit more indulgence and suited to the winter weather than the previous months. I love a good curry and have been making a lot of meatball recipes lately, so I thought why not combine the 2 and I came up with this dish.

I chose to make the meatballs and cook them separately to the curry but you could very well also cook them in the curry sauce, they will just have a softer texture and not the crispy texture to the  shallow fried version. Last Saturday one of my friends and I did an Ashtanga yoga workshop, then came home and whipped up this dish. The time involved was quite minimal but the results were amazing. The veggies were the right ones to complement the dish and the curry had a nice thickness to it due to the use of coconut cream not coconut milk. As I added heaps of spices and seasoned the meatballs really well each bite of them was delicious and the meal was a great success.

This dish freezes really well too, I use sandwich plastic bags in the freezer so they don’t take up too much room and then mid-week you can have a delicious meal without the labour and wash up time.

Stay tuned as the next version of this dish is going to be a Thai Green Curry with chicken meatballs – yum, yum!


Serves 4
Prep time: 15 minutes
Cook time: 30 minutes

Pork meatball Ingredients

500 grams pork mince
1 ½ tablespoons minced garlic
1 tablespoon chilli flakes
1 teaspoon fennel seeds
1 tablespoon olive oil
salt (to season)
pepper (to season)

Meatball method

  1. Add mince, garlic and spices to mixing bowl, stir to combine
  2. Roll into meatballs, place on lined baking tray
  3. Add splash of oil to fry pan, cook meatballs, turning once for approx. 5 minutes
  4. Rest on plate with paper towel for 3 minutes after cooking

Curry ingredients

jar red curry paste
2 x 400ml cans coconut cream
large red capsicum, thinly sliced
200g baby spinach leaves

Curry method

  1. Put a splash of oil olive in the fry pan, add the curry paste and fry off for 3 minutes
  2. Add the coconut cream and stir to combine
  3. Add the meatballs, capsicum and spinach, put lid on and simmer for 3 minutes
  4. Serve with rice


1496526871994

Mince mixture for the meatballs – add lots of spices and season well!!

1496526916262

You can see the chilli flakes and fennel in this picture – full of flavour!

1496527002245

Cooking the meatballs, takes no time at all.

1496527080219

Meatballs resting after being cooked.

1496527190805

Lots of spinach can be added and needs hardly any cooking time.

1496527246305

Yum! Ready to eat .

Enjoy!! xx


Posted in Dinner, food, Food photography, Home cooking, receipes, Vegetables, Weekend | Tagged , , , , , , , , , , , , , | 4 Comments

Brisbane’s Inala

I haven’t been able to blog as much as I would like recently as I have had some work events on to attend on my weekends and also some family gatherings that have been keeping me super busy. For reasons I won’t bore anyone with, I didn’t have the greatest night of my life last night and after waking up and thinking, I will just pop out and get a chai and some cup noodles and then come home and get in my pj’s again and chill, I got to texting one of my friends who helped me get my groove on again (thank-you Olivia).

So, I headed out, went to buy my sister’s birthday present so I could mail that in time for her to get it for her actual birthday and then satisfied my craving by going to Inala for lunch. I have to say, I think I would eat there every day if I could, I love the taste and freshness of the food there so much and there are so many options.

With work colleagues as our base is close, we started going there a few years ago (I am been forever grateful for that introduction to the wonders of the food there, Jeremy and Gerard 🙂 ) and today I ate at one of the places we had been to on a particularly hot day in the past as the place is air-conditioned unlike some of the other places I have been to many a time.

I chose Trah Vinh today as I knew one of my other favourite places would be busy and I would likely have to share a table, but I had popped to the library nearby to get some reading material and wanted to spread out with my magazines. Plus one of my colleagues and I had got take away for lunch from there about a week ago and I knew that the particular meal I had in mind would hit the spot.

I am blown away by how good the food is there. I am not sure if it is because I didn’t grow up eating it or the freshness or what, but I am very rarely unsatisfied by a meal from the many options there.

My experience today was good for a number of reasons, another being I got caught up in an article about 3 yoga teachers who had unfortunately been involved in tragic accidents at some point in their lives and the stories went on to explain how each person coped with their own personal situation. I got over my funk pretty quickly as I realised that my problems and frustration of the weekend thus far was minimal compared to other peoples and I am very happy that my awareness of gratitude came back to me in the way that it did.

One of my friends is coming over shortly so we can head to an Ashtanga workshop this afternoon followed by some drinks, more delicious food and a lengthy girl to girl catch up which I am looking forward to. But, as loathe as I am normally to take photos of food that other people cook for me as I always thought this as rather lazy way to engage with my passion for food and cooking, I simply had to put into words that I encourage anyone in the Brisvegas area to get a meal at Inala even just the once to experience how lucky we are to live with the cultural diversity we do in Australia. Inala gets a bad rap, I think it always has. I understand that the crime rate might be higher and the socioeconomic rate lower, but gee whizz the locals there can cook! This meal hit the nail on the head for me and I had to think twice about putting my chopsticks down and picking up the bowl, putting it to my lips and slurping down the remaining few noodles (I didn’t).

Mine was number 32 if I recall correctly, spring rolls with pork and a noodle salad – yum, thank-you to my lunch time chef and without a doubt you will see me there again.

Cheers – have a great weekend everyone and I hope that if you find yourself in a funk ever, the right combination of things will occur to bring you right back out of it.

1496460355343


XX


Posted in Eats around, food, Weekend | Tagged , , , , , , , , , , | 2 Comments

Jam Donuts

I made a cake for work last week and one of the comments that I got was that it tasted like a hot fresh donut. It didn’t take me long to sit there and think ‘mmmm donuts,..mmm…jam…mmmm jam donuts…mmm…must google jam donut recipe…’ and whola that became my thing to cook this weekend.

I am a fan of hot cinnamon donuts that have been cooked not long before eating but I probably only have about 1 a year, if that. They are just not something I indulge in too often. This weekend, I had looked up this recipe (taken from taste.com.au however, I used almond milk instead of the recommended normal milk as these days I only ever really have that or coconut on hand. Not sure that coconut would taste as good in cooking, but I find almond excellent to give sweets a nice flavour and have never been disappointed when baking with it.

The most tedious thing about this recipe is that you have to have a bit of time to do it. There are 2 times in the method that you have to leave the dough to rise and if you were pushed for time, I don’t think you would get the same results.

The cooking time is super fast and I was surprised how many the recipe made. Piping the jam was interesting but easy to learn from the 1st time how I could improve for next time eg jam with less chucks of fruit that can get stuck in the piping nozzle. Also having made these and got a hang of the techniques involved now I am dreaming of the endless possibilities eg chocolate donuts, lemon curd donuts, custards ones, yum, yum, so many variations to explore, can’t wait for more free time to try another batch!!


Prep and cook time: 2 hrs 30 minutes Serves: 12

Jam Donut ingredients

490g (3 1/4 cups) plain flour
55g (1/4 cup) caster sugar
3 teaspoons dried yeast
pinch of salt
250ml (1 cup) almond milk, warmed
100g butter, melted
3 egg yolks
canola oil, to deep-fry
jar strawberry jam
icing sugar, to dust

1494756459907149475653036914947565789291494756609513149475663939014947566967321494756729625

Jam Donut method

  1. Add flour, salt, egg yolks and yeast to food processor with kneading blade
  2. Melt butter in microwave and then pour in almond milk
  3. Add liquid to the dry ingredients and knead for approximately 4 minutes
  4. Take dough out and transfer into large mixing bowl lined with plain flour, cover with glad wrap and refrigerate for a minimum of 2 hrs.
  5. Take dough out, roll into flat shape and cut 6cm rounds, lightly dust in flour and leave for 30 mins
  6. Heat oil in wok and start to add donut shapes, 4 at a time
  7. Cook for 1 minute each side before resting on paper towel
  8. Roll in icing sugar
  9. Pipe strawberry jam into centre of donuts (when cool)

Enjoy xx


Posted in Baking, Cooking, Dessert, Food photography, Home cooking, Uncategorized | Tagged , , , , , , | 8 Comments

Satay Chicken Noodle Bowl

I feel like I haven’t done a post in a while, as I had holidays and then getting back to work and yoga has kept me really busy so things have been hectic in Brisvegas. But, inspired from my Satay Pork Noodle Bowl of last week, I decided to do a different take on it this week and I was very happy with the results. I definitely haven’t been eating as much meat over the last few years and sometimes I will look for options other than red meat for example turkey, chicken or pork. In making this meal this week, I knew the flavours I wanted to created and to have a good balance of protein and veggies.

Working full time often means things get busy! Coming home, doing some exercise, then also going to yoga and then home again from that and wanting a quicker option for dinner that doesn’t take long to prepare but sill has nutritional value and taste. I don’t get take away very often as I like to know what goes into my meals and I enjoy cooking so prefer to do it myself than have someone do it for me most meals, however, I do feel the desire to be able to prepare something which doesn’t take forever at times depending on how busy and tired I am. I had a flu shot this week and a really long 1 1/2 yoga workshop yesterday (which was awesome) but those things also make me realise how good it is to then balance out my time with a home cooked but not too long slaved in the kitchen meal.

With this dish, the most time consuming thing is making the meatballs and cooking them, however after that is done then the rest of it is quick and easy. If you can make the meatballs on the weekend, you can freeze and reheat them during the week for when you don’t have as much time.

I like to put lots of spices into the mince mixture as well as seasoning it really well and the time spent doing that is worth it as you bite into them and can a really tasty combination of flavours.

Prep and cook time: 30 minutes Serves: 2

Satay Chicken noodle bowl ingredients

500 grams chicken mince
1/4 cup satay sauce
1 ½ tablespoons minced garlic
1 tablespoon cardamon powder
1 tablespoon chilli flakes
125g vermicelli noodles
2 handfuls rocket leaves
3 shallots, thinly sliced
1 carrot, peeled and sliced
salt (to season)
pepper (to season)

1493801257613149380128297414938013058561493801356499149380133458920170507_08070314938014867191493801510899149380154022214938015621191494108052544

Satay Chicken noodle bowl method

  1. Add mince to medium sized bowl and season well with salt and pepper
  2. Add garlic, cardamon and chilli flakes and stir to combine
  3. Add the satay sauce and stir through
  4. Place a sheet of baking paper on a tray and roll the mix into small meatballs
  5. Put a splash of olive oil into a frypan and turn onto a medium heat
  6. Add the meatballs and cook for 4 mins each side, turning and moving the fry pan to get the balls to cook on all sides
  7. Turn the frying pan off and place the meatballs onto paper towel to rest
  8. Place the vermicelli noodles into a heatproof bowl and pour enough boiling water over to cover them, use a fork to separate, leave for 3 minutes
  9. Rinse the water from the noodles and portion them out into 2 serving bowls
  10. Start to top the noodles with the rocket, carrot and shallots
  11. Top with the meatballs and sprinkle peanuts on top (optional, not shown in my last pic)
  12. Use additional satay sauce as a dressing

Enjoy xx

Posted in Cooking, Dinner, Easy meals, food, Food photography, Home cooking, Vegetables | Tagged , , , , , , , , | 2 Comments

Satay Pork Noodle bowl

I find one of the best ways to get inspiration for my meal planning and cooking is to look through books and magazines. A favourite of mine are the Coles and Woolworths magazines as I find that they are always up to date with the latest trends as well as exploring seasonal ideas for food. When I got back from interstate and was doing my shopping, I picked up the latest Coles magazine, it was an Easter Special. I headed to the pub that afternoon for a cold beer off the tap, so I took it with me and decided to have a flick through to get some ideas. One of the recipes I came across looked like it had a Vietnamese twist to it and I love Vietnamese food so I decided on that for last weekend. I had all of the ingredients but randomly I didn’t feel like cooking (shock horror) so I froze the mince and took it out again as one of my friends was coming over for Anzac Day afternoon so decided we could make it and enjoy it together. The preparation was half the fun for this meal as we got to have a beer, cut the veggies and put it all together in a bowl. I love how colourful the dish turned out and that as well as getting your protein and veggie serves, you also get a bit of spice from the chilli flakes in the mince and the satay sauce.

Prep and cook time: 30 minutes Serves: 2

Satay Pork noodle bowl ingredients

500 grams pork and veal mince
1/4 cup satay sauce
1 ½ tablespoons minced garlic
1 tablespoon fennel seeds
1 tablespoon chilli flakes
125g vermicelli noodles
butter lettuce
1 carrot
1 lebanese cucumber
1 red capsicum
3 shallots
granulates peanuts
salt (to season)
pepper (to season)

14934436464221493443676190149344370368914934437298801493443756140149344378727214934438582541493443885808149344391043714934439831511493443936113149344402263414934440677491493192023022

Satay Pork noodle bowl method

  1. Add mince, garlic, fennel and chilli flakes to medium sized bowl
  2. Season with salt and pepper then stir to combine
  3. Add the satay sauce and stir through
  4. Place a sheet of baking paper on a tray and roll the mix into small meatballs
  5. Put a splash of olive oil into a frypan and turn onto a medium heat
  6. Add the meatballs and cook for 4 mins each side, turning and moving the frypan to get the balls to cook on all sides
  7. Take out and set aside
  8. Place the vermicelli noodles into a heatproof bowl and pour enough boiling water over the noodles to cover them, use a fork to separate, leave for 3 minutes
  9. Cut the carrot, capsisum and cucumber into edible portions, break apart the lettuce leaves and place with the veggies
  10. Rinse the water from the noodles and portion them out into 2 serving bowls
  11. Start to top the noodles with the veggies
  12. Reheat the meatballs and place on top, sprinkle peanuts on top
  13. Use additional satay sauce as a dressing

Enjoy xx

Posted in Dinner, Down time, Easy meals, food, Food photography, Home cooking, Vegetables, Weekend | Tagged , , , , , , , , , | 2 Comments

BBQ Chicken Skewers

I have been on holidays and in WA with family for the last little while. We had many meals out and about and a few in and one of the nights we did a BBQ and I made these delicious chicken skewers. It was quite funny to have to adapt my normal cooking where I have every spice and herb at my fingers tips as well as tins, pans and utensils to a different style of cooking, where there was less available to create with and a more relaxed style to the meals we ate. We stayed at a beautiful air b and b in a place called Marmion, it was walking distance to the beach – an amazing trip. Not to mention the highlight with the birth of my 1st nephew – the gorgeous little Ozzy Cullen. Welcome to the world Ozzy, we are all so happy you have arrived and will get to be part of your lives and watch you grow and learn in this big wide world of ours.

This meal was one I did the night Ozzy was born, where most of the family waited at the house for news before heading to the hospital to meet our newest member.

The trip itself was amazing, we really got out and about and saw the sites. Rottnest Island was a definite favorite and it was very cool to see the cute little Quokkas – kind of scary to see them eating the left over food on the island though * 😦 * . I might do a separate post about the holiday and talk about all the places we went to in a non food related manner (to be continued!)

Prep and cook time: 30 minutes Serves: 6

Chilli chicken marinade ingredients

1 ½ tablespoons minced garlic
3 fresh red chillis
1/3 cup brown sugar
1/4 cup white vinegar
1 tablespoon red wine vinegar
1 tablespoon olive oil
juice of one lime
salt (to season)
pepper (to season)

Chilli chicken marinade method

  1. Add garlic to medium sized mixing bowl
  2. Chop chillis and transfer to the bowl
  3. Add brown sugar
  4. Add white vinegar
  5. Add red wine vinegar
  6. Add olive oil
  7. Add lime juice
  8. Stir, leave to sit for 5 minute

Lemon pepper marinade ingredients

1 ½ tablespoons minced garlic
1/3 cup olive oil
1/3 cup lemon juice
salt (to season)
pepper (to season)

Lemon pepper marinade method

  1. Add garlic, olive oil and lemon juice to mixing bowl
  2. Season well with salt and pepper
  3. Stir, leave to sit for 5 minutes

Avocado Salad ingredients

1 x prepacked lettuce leaf salad
1 x large avocado
1 x ½ lemon to drizzle as dressing

BBQ Chicken skewers method

  1. Count out enough skewers and put them in a dish of water for 30 minutes so they don’t burn when you cook them
  2. Set up 2 dishes for your marinade
  3. Make each marinade in the dish and cut the chicken into slices to ensure all parts of the meat are nicely coated.
  4. For the chilli marinade have a red onion and slice it into portions to add between chicken pieces
  5. For the lemon pepper marinade use a red capsicum
  6. Cut the chicken into cubes and thread onto the skewers alternating with the vegetables as you go
  7. BBQ the skewers on a hot bbq plate turning as you go for 20 – 30 minutes until the juices run clear.

14923012617201492301214332149230117966314926463917501492646365800149230111195714923010640991492301139040

I found this meal to be easy and delicious – perfect for our occasion. A BBQ is such a good way to celebrate with family and friends and there is not as much preparation work as an oven baked meal. Not to mention the wonderful smells from the moment the skewers hit the hot plate!


Posted in Cooking, Easy meals, food, Food photography, Home cooking | Tagged , , , , , | 2 Comments

Rocket Pesto

This rocket pesto is to die for! I love making homemade pizzas and after earlier this year trying Kale Pesto for the 1st time, I realised I wanted to try the same with rocket. I have made Basil Pesto a number of times however, it is nice to make something new and different and this hits the nail on the head. The best thing is that you can use it for a base for homemade pizza instead of barbecue or tomato sauce, both of which have a lot of sugar. Another good thing about making pesto, is that it is super easy to divide up into small sandwich bags, label and freeze so mid week when you want the depth of flavour but you don’t have time for it, you can take it out and either defrost it during the day or nuke it in the microwave so that you can get use it for your meal without the prep time and clean up time needed to prepare and make it.

I have never eaten rocket pesto when out and about, am open to it, but have not yet ordered anything that it has been served with. I think it has many uses – on breakfast plates, for pasta, for a topping on eggs, for a bit of a dip and many more ideas.

This recipe is simple and straightforward. You need a good food processor and away you go. I have tried many different store bought pesto’s over my time and even though there is one at Aldi which I think beats all other store bought ones, I always prefer to make my own as I often find the store ones to be too salty.

I have never been an awesome grower of fruits and veggies, albeit I have tried, but a lot of the ones I have tried to grow have died.  Either they were too hot or too well watered or something, I never knew quite what I did to kill them. However, rocket is a vegetable that has so many versatile uses that with some of that and some baby spinach leaves in your garden, I think you are home and hosed. If you are buying it, I recommend the separate bags of rocket leaves as opposed to the combined ones. In my experience the rocket leaves tend to go wet and withered much faster than the spinach leaves to the point that you have to throw away a lot of good spinach due to aged rocket. If you buy them separately and keep them in your fridge in separate containers you will have your green smoothies as well as dinner greens sorted.

Prep and cook time: 15 minutes

Rocket Pesto Ingredients

120g rocket
5 large garlic bulbs, peeled
1/3 cup parmesan cheese, grated
1/3 cup pine nuts
1 tablespoon olive oil
1 tablespoon lemon juice
salt, to season
pepper, to season

Rocket Pesto Method

  1. Fill processor with fresh rocket
  2. Peel and cut ends of garlic bulbs and add to processor
  3. Add cheese and pine nuts, turn on to a low speed
  4. Pour the olive oil in through the top opening of the blender
  5. Take off the lid, scrap down the sides with a spatula and then pour in lemon juice, stir further till all combined.
  6. Taste and add a little more lemon juice if needed

Enjoy!! xx


wp-1490668135905.jpgwp-1490668151063.jpgwp-1490668172802.jpgwp-1490668191125.jpgwp-1490668259750.jpg

wp-1490668007775.jpg

Posted in Cooking, Easy meals, food, Food photography, Home cooking | Tagged , , , , | 2 Comments

Choc Banana Smoothie Bowl

Weekend breakfasts!!! They are the best! I never mind eating more food on the weekends as I like to indulge a little. It is so easy to make a smoothie bowl and top it with awesome ingredients. The hardest bit I find would be remembering to chop the banana up the night before and put it in the freezer. The smoothie definitely doesn’t taste as good if the banana is not frozen first. Having experimented over the last year with different types of smoothies, I would say this combination is one of the best. I never used to like banana in a smoothie as I felt it made me too full but then I began using almond milk and now I absolutely love having a banana smoothie for lunch some days also.

This is as simple as adding the ingredients, blending it, pouring it into the bowl and topping it however you wish.

Choc Banana Smoothie Bowl ingredients

1 x cup frozen banana
1 tablespoon cacao powder
1 cup almond milk, chilled
1 tablespoon honey
cinnamon powder, pinch
nutmeg powder, pinch
coconut chips
cacao nibs
passionfruit
strawberries

Choc Banana Smoothie Bowl method

  1. Add frozen banana, cacao powder, almond milk, honey and spices to blender cup
  2. Blend ingredients till smooth and consistent
  3. Pour into serving bowl
  4. Top with coconut chips, cacao nibs, strawberries and passion fruit

wp-1490787417875.jpgwp-1490787305080.jpgwp-1490787305078.jpgwp-1490787078088.jpg

Posted in breakfast, Food photography, Home cooking, Weekend | Tagged , , , | 2 Comments

Pumpkin, pine nut and rocket pizza

If homemade pizza is not the best thing ever to cook, I honestly don’t know what is. It is so easy to do and there are so many great toppings to play around with, not to mention that your own style ones won’t leave you feeling too full and needing to wash it down with a coke the way that some store bought ones do.

One of my friends (thank-you Kayla) brought me this awesome piece of jap pumpkin earlier in the week and I knew I wanted to season it and roast it, then I was thinking, hmmm what can I do with it, then of course homemade pumpkin pizza came to mind. We were talking about pizzas at work today and I would not be surprised if the 3 of us involved in the conversation ended up with our own varieties coming fresh out of the oven tonight. They are just so easy to make and tasty at the same time.

I pretty much always use whole wheat pita bread now. I find it goes crispy really well, and holds the ingredients on top quite well also. I have used tortillas in the past as well for the base, but sometimes I think it varies on results depending on which brand you get. With whole wheat pita, I find the results are pretty consistent and you would have to not be paying any attention to burn it whereas the tortilla base cooks a lot faster and you do run that risk.

Last night I seasoned and roasted my pumpkin and then tonight I char grilled it on the stove top for a little bit. After that it was a simple matter of putting a few ingredients on the top and pacing out the cooking so that each layer had started to cook before the next layer went on top.

Hump day = homemade pizza day, I say! Weekend looks like it is fast approaching, woo hoo. Would have loved a glass or 2 of a nice shiraz with this tonight, but I haven’t been drinking other than the end of the week for a while now, so I will have to save that thought and enjoy that coming my way soon.

Prep and cook time: 30 minutes Serves: 2

Pumpkin, pine nut and rocket pizza ingredients

1 x whole wheat pita bread
2 tablespoons rocket pesto (homemade)
6 slices chorizo
sprinkle of grated cheese
½ cup pumpkin, roasted, then chargrilled
1 long red sweet chilli pepper
1 green jalapeno
drizzle of balsamic vinegar
handful fresh rocket

wp-1490785342250.jpg

wp-1490785072590.jpg

Pumpkin, pine nut and rocket pizza method

  1. Preheat oven to 180 degrees
  2. Cover pita with rocket pesto, grated cheese and top with chorizo slices, oven bake 2 minutes
  3. Top with pine nuts, bell pepper and jalapeno, bake another 2 minutes
  4. Take out of oven, pour balsamic vinegar over pumpkin pieces and add handful of rocket

wp-1490783317146.jpg


Posted in Dinner, Easy meals, Home cooking | Tagged , , , , , , | 1 Comment

Food photography background board tutorial

So, I have been wanting to find more backgrounds to use for my food pics but I wasn’t really sure where to start or what I wanted to achieve. But I took to Pinterest and was able to find some tutorials on making food photography backgrounds so I took out my paints and decided to create one for myself. I always envy people on Instagram who have amazing pictures of not only their food but their kitchen set up and sometimes I have to rack my brain to figure out how they achieve such cool backgrounds. I admit that most of the time, I cannot figure this out, sigh!

So instead of running out and buying a new kitchen or marble bench top every time I wanted to take pictures of something, I thought I would experiment with making my own and see what I could come up with.

Last weekend, I went to this awesome shop that I used to go to frequently when I was studying Architecture. At the time it was located in West End, but before leaving the other day, I googled it and am glad I did as I found out they have moved to Woolloongabba. So off I headed with the dimensions and idea of what I was after ever optimistic that I would find it………I was blown away that I actually did find what I was looking for and at bargain prices!! I am not a total tight arse, but I have, in the past, spent loads of money on hobbies, ie painting, jewellery making, timber making only to find it was something that I wasn’t really into long term and I felt when I go through phases like that it is sort of a waste of money. I never however, really feel that way with cooking as I see it as a necessary part of life but as I love it so much, I am able to turn it into a hobby that fits in with my life but doesn’t cost me an abominable fortune.

So, what I was looking for was some kind of timber or bench top, different to what I already had that would fit my kitchen bench and store easily out of the way.

I picked up 3 awesome boards – the light cream one in the pics below was a measly $5 can you believe it!!!! If I get over this hobby in a little bit (which I am pretty confident I won’t but you never know, I won’t mind having spent that and then donating it to charity for someone to do what they wish with it). I wouldn’t feel this way if I spent a ton of money as I am more practical when it comes to money than that and enjoy being thrifty where I can be (within reason).

Board Zero

So, now, I would like to show you what I did with my new ‘kitchen bench top’ and how I turned it into a background for my food blog. Dun, dun, dun, dar, que the music! 

From Pinterest, the best advice I could find came from this blog, http://www.confessionsofafoodie.me/2015/07/how-to-paint-photo-backgrounds.html I did look at a number of ideas on there, but I found that Ani’s was the closest to the look I wanted to create and I loved how the blog post showed you step by step pictures along the way of how she created her boards – thanks Ani!!

Board 2Board 1

 Method 

  1. I taped the edges of my kitchen board with masking tape as I wanted to be able to use both sides of the board and I didn’t want too much mess going down the edges to be seen when I use the lighter side.
  2. I started with a layer of gesso, I used to use this all the time to prime a canvas even if it was coated with gesso just to get a feel for the material and size and the frame.
  3. After the gesso had dried I did a layer of black paint, using gouche. It is what I already had in my painting kit, so I figured I would try that. (Otherwise I would recommend acrylic paint).

Board 3.jpg

Board 44.jpg

5. After waiting for the paint to dry, which took approximately 1 hr, I then did a layer using modelling compound.
6. For this I used a kitchen knife to spread it around and then I used some rubber tipped painting tools to create various textures.

Board 5Board 6

7. After this was dry, I then did the final layer of paint, mixing black and white as I wanted the finished colour to be grey not black and have a bit of different shades through it to create a nice non solid colour effect.

Board 7

8. The final step in the process which I did as Ani had advised she did this for hers, was to cover the board with a matte varnish. I did mine as per the bottle instructions because I noted her advice that varnishing it would be a good way to seal all the paint so that it doesn’t go all over the actual bench when I am using the other side (insert shocked smiley emoticon with hands on side of face, when realising bench was covered in black/grey paint, oh nooooooooooooooooooooooo! which did not occur luckily as the varnish did the trick).

9. Not only was this a super fun way to spend sometime it allowed me to be creative in a hands on way that I don’t get to do as often as I would like these days. I encourage anyone who is into their food photography to give this a red hot go, better than purchasing textures off the internet which anyone can use and the results are original, one of a kind!

Board feature picture

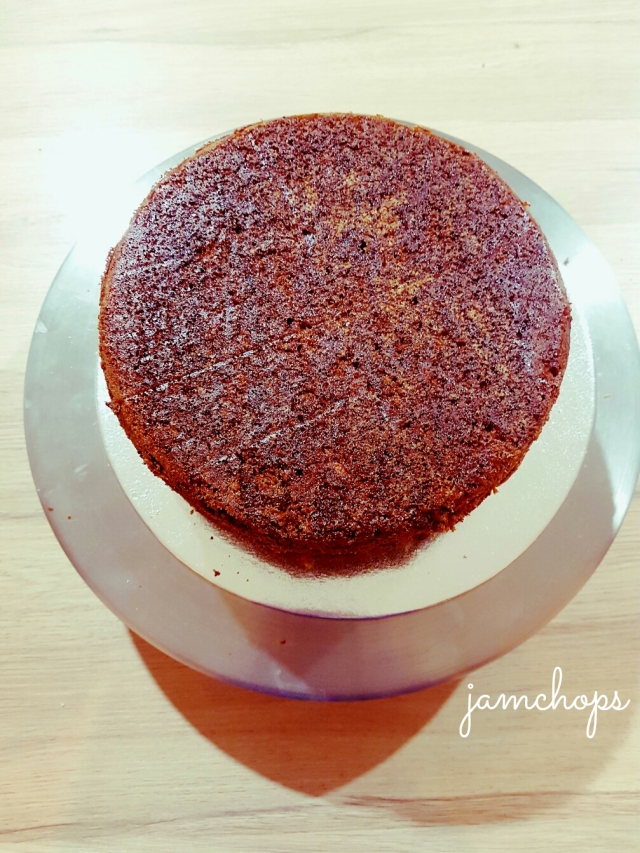
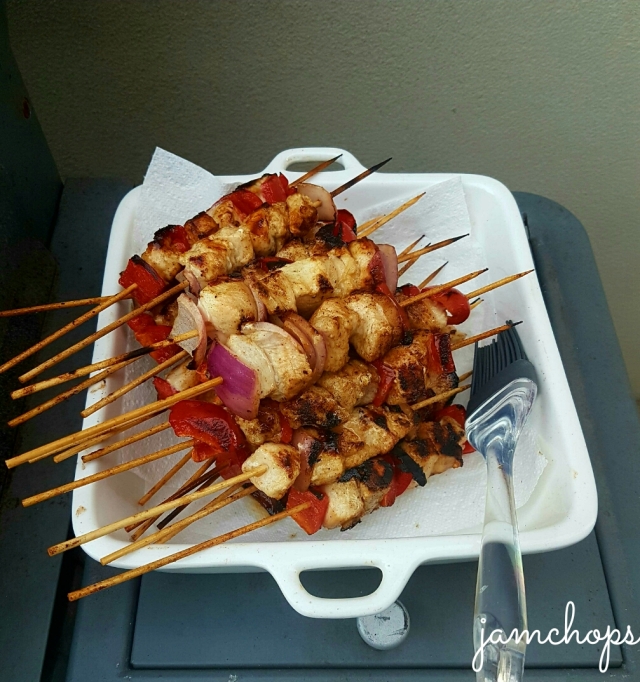
This is the final product – me using the board I made in one of my instagram pictures with a delicious homemade pizza I had some of for dinner. Wola!! I am very happy with the results.
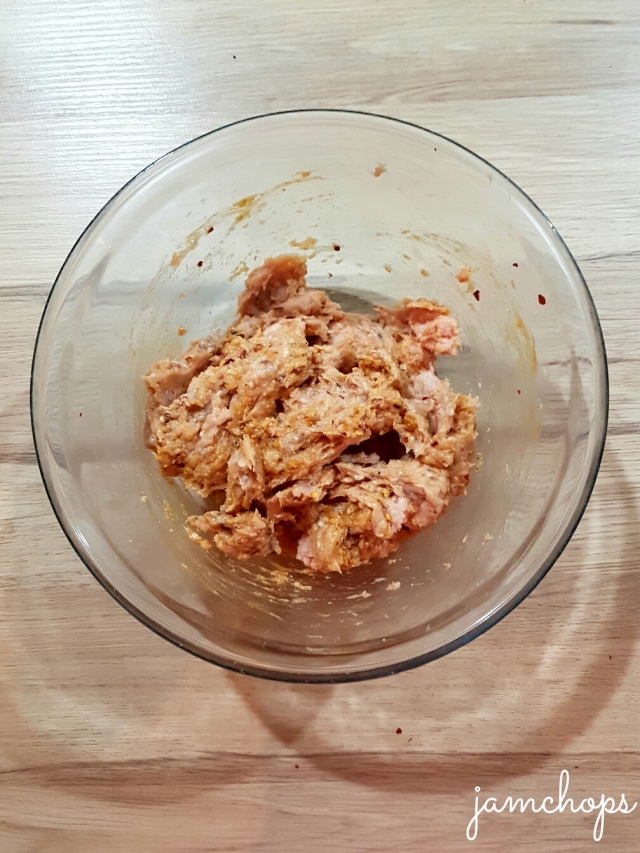
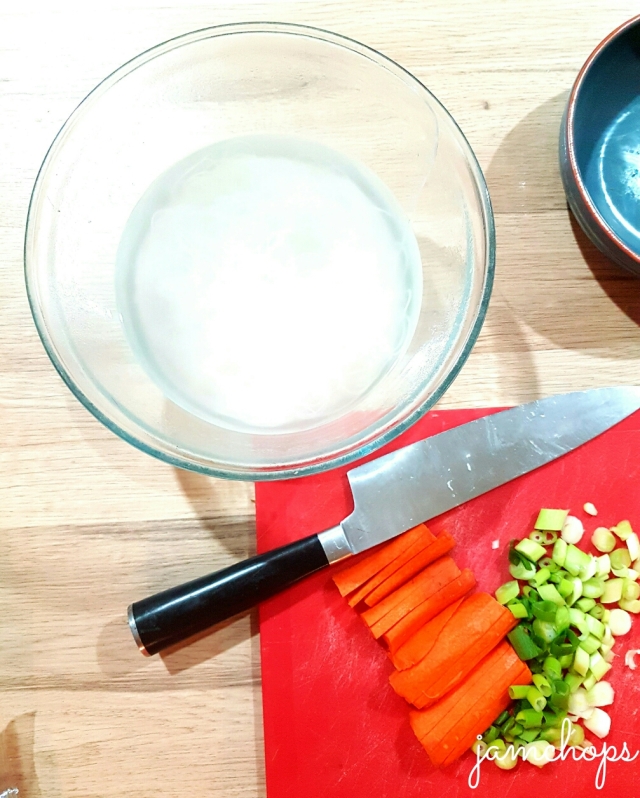
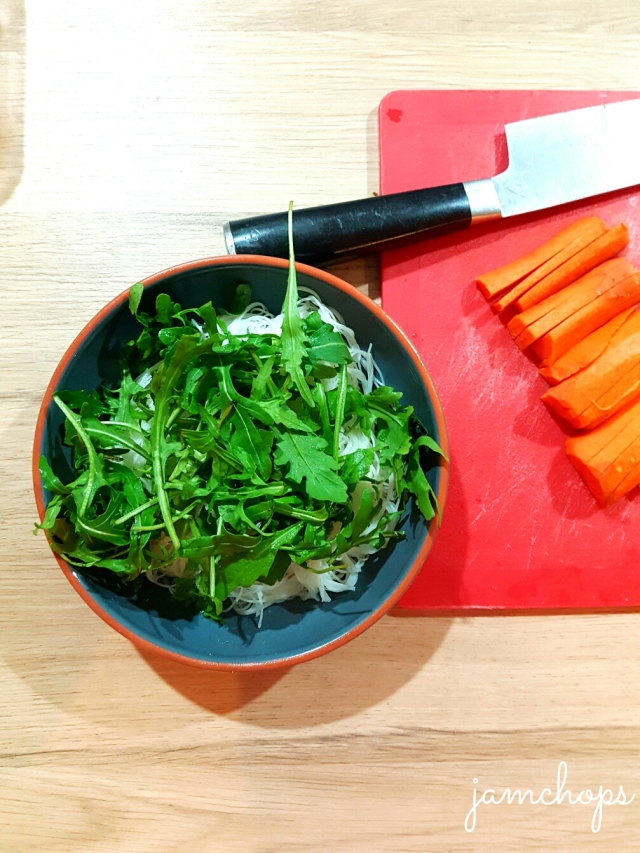
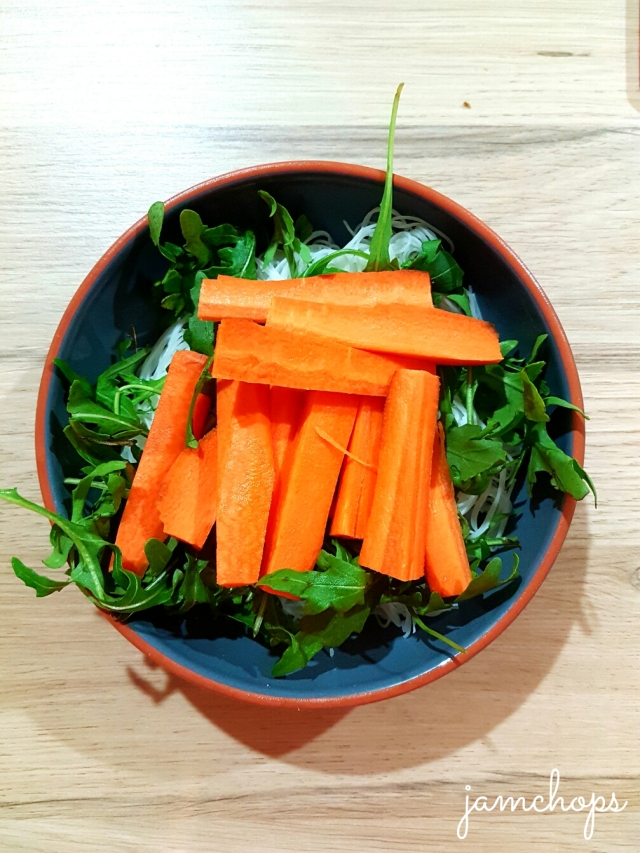
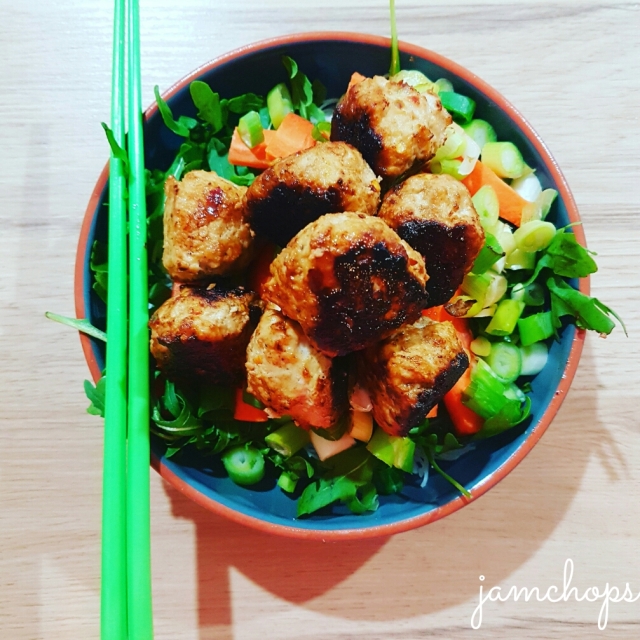
Board in photos

Posted in DIY, Down time, Tutorial, Weekend | Tagged , , , , | 10 Comments

San Choy Bow

I love this dish! It is so simple and easy and tastes great as well as not leaving you feeling too full or bloated after eating. Rolling the leaf into your hand and chowing down on the meal is so enjoyable as you know that the balance between protein/veggies is ok and the sauce gives the mince a lovely rich flavour.

Prep and cook time: 20 minutes Serves: 2

San Choy Bow Ingredients

2 tablespoons sesame oil
500 grams pork mince
1 tablespoon garlic, minced
3 fresh red chillis, chopped finely
1 cup peas, frozen
1 large carrot, grated
1/4 cup sesame seeds
1/4 cup (60ml) hoisin sauce
2 tablespoons soy sauce
6 lettuce leaves, cup shape

San Choy Bow Method

  1. Put a splash of sesame oil in the frypan and turn on the heat to medium-high
  2. Add the mince and stir fry for 5 minutes, break up any chunks using a flat utensil
  3. Add the peas, put the lid on and leave to 2-3 minutes till defrosted
  4. Add the chopped chilli, stir to mix in
  5. Add the carrot, stir to combine
  6. Add the sesame seeds
  7. Add the hoisin and soy sauces and stir to combine
  8. To serve, scoop mix into lettuce leaves

Notes:

Serve with Pork Crackle Chips

San choy Bow to Serve

Enjoy!! xx

Posted in Cooking, Dinner, Easy meals, Food photography, Home cooking, Vegetables | Tagged , , , , , , , , | 3 Comments

Blueberry Mango Banana Smoothie Bowl

This smoothie bowl was the perfect way to start the weekend. Quick and easy to prepare with delicious results!

Blueberry Mango Banana Smoothie Bowl ingredients

1 frozen banana
1 cup frozen mango pieces
1/4 cup frozen blueberries
1 cup Almond milk
1/4 cup coconut chips
2 fresh strawberries
1/4 cup frozen thawed blueberries

Smoothie bowl 3


  Blueberry Mango Banana Smoothie Bowl method

  1. Add banana, blueberries and mango to blender cup
  2. Pour in Almond milk
  3. Blend till smooth
  4. Pour into serving bowl and smooth out the top
  5. Top with coconut chips, strawberries and blueberries

    Smoothie bowl ready

Ready to eat – yum

Enjoy! xx


Posted in breakfast, Easy meals, Food photography, Weekend | Tagged , , , , , , , , , | 1 Comment

Baked Lemon Lime Tart

This tart recipe is a winner! It is absolutely delicious and you can taste both the lemon and the lime juice when you eat it. The 1st time I made it, I did it in a long rectangular tart dish and as I had a few cracks in the pastry when I poured the liquid in for the filing, it ran out the cracks and the entire bench was covered in a sticky yellow goo. It was not pleasant, but I didn’t quit. At that time, I managed to salvage enough from the remaining mixture and the result was pretty good, however, I felt a strong sense of wanting to improve on what I had done for next time. I took to you tube and watched how other people made their lemon tarts and the best tips that I found were to keep the pastry shell in the oven on a flat baking tray and pour the liquid into the tart base that way. It made sense but I never would have thought to do that had I not learnt this tip from someone else.

The pastry recipe for this comes from a Woolworths Fresh Magazine for Mini Lemon Curd tarts (double to cover the tart base and the filling recipe comes from a cookbook my friends gave me at one stage for my birthday (Thanks Emily and Tim), – Best of Bill – The Ultimate Collection of Bill Granger’s Recipes.

I find when I am eating a slice, the combination of the lemon  and lime juices face off against each other like in a boxing ring and you get a ‘pow’ ‘pow’ from each side!

Tart Pastry Ingredients

2 2/3 cups plain flour
2/3 cup sifted icing sugar
280g butter, diced
1 egg
1 tablespoon vanilla extract

Image one: Dough about ready to chill in the fridge

Lemon Lime Tart filling Ingredients

4 eggs
1/3 cup caster sugar
1/2 cup cream
1/3 cup lemon juice
1/3 cup lime juice


Image two : Filling mix ready to pour

Pastry Method

  1. Sift flour, icing sugar and put into a large mixing bowl.
  2. Add the butter and stir through.
  3. Whisk one egg and add it to the mixing bowl
  4. Add the vanilla and keep mixing
  5. Transfer the contents of the mixing bowl into your food processor with a dough blade (plastic)
  6. When the ingredients are mixed together well and there is no big chunks of butter, lay a piece of glad wrap on the bench.
  7. Take the bowl and transfer the mixture onto the gladwrap
  8. Move the sides of the wrap up and around the pastry, you will notice that it sticks together well and you can role into into a solid shape.
  9. Put the pastry in the fridge for at least 20 minutes.
  10. After 20 minutes, take the pastry out and role into into a flat sheet, approximately 4mm high. I like to use glad wrap on both the top and bottom of the pastry and use a rolling pin to flatten the mix.
  11. Turn the oven on to 180 degrees.
  12. Grease a 9 inch round loose insert tart tin with butter
  13. Once the pastry is rolled out, take the top layer of gladwrap off
  14. Slide the tin closer to the pastry and in a swift movement flip the pastry over to cover the tin
  15. Pull excess pastry away from tin edges
  16. Prick with a fork
  17. Refrigerate for 10 minutes
  18. Take tin out of the fridge and place on a flat baking tray in the oven
  19. Cook for 20 minutes until the pastry is a light golden colour
  20. Take out of the oven and set on a wire rack to cool


Image three: Cooked shell cooling down

Filling method

  1. Crack the eggs into a medium size glass bowl
  2. Add the caster sugar
  3. Whisk to combine
  4. Pour in the cream and stir through with a spoon
  5. Add the lemon and lime juice and continue to stir until the mixture is smooth and consistent.

Liquid into tart shell method

  1. The best way to fill you tart with the liquid is to have a flat baking tray in the oven and take the liquid to the oven in the bowl
  2. Pull the oven rack out towards you about 1/3 of the way
  3. Pour the liquid mix into the tart shell and then put the bowl down on the bench
  4. Use both hands to push the rack back into place being careful to not have the liquid splash out over the edges
  5. Bake the tart with 30 minutes until the filling is just set
  6. Transfer to a wire rack
  7. When cool cover with icing sugar.
  8. Serve with vanilla ice-cream and fresh strawberries

     
    Image four: Tart cooking

    The things that I have found could go wrong with this recipe and to watch out for are:

    1. Cooking the pastry for too long and burning it
    2. Having small cracks in the pastry so the liquid seeps through when you pour it into the tin
    3. Overfilling the pastry shell and having excess liquid spill down the outside of the tin

Enjoy!! xx

Posted in Baking, Dessert, Food photography, Home cooking, receipes, Uncategorized | Tagged , , , , , , , , , , | Leave a comment

Raspberry Smoothie Bowl

I was feeling a bit girly this morning and I wanted to make something pretty and pink! My Raspberry Smoothie bowl did the trick.

Raspberry Smoothie Bowl ingredients

  1. 1 cup low fat greek yoghurt
  2. 1 cup frozen raspberries
  3. 1 frozen banana
  4. 100ml almond milk
  5. 1/4 red apple
  6. handful fresh blueberries
  7. 3 pinches coconut chips
  8. 1 tablespoon cacao nibs

Raspberry Smoothie Bowl

  1.  Add 1 cup of low fat greek yoghurt to your large blender cup
  2. Add raspberries, banana and almond milk
  3. Blend till you have a smooth but thick consistency
  4. Pour into serving bowl
  5. Add coconut chips, apple, blueberries and cacao nibs

Image one: Breakfast here I come!

Enjoy xx


Posted in breakfast, Down time, Easy meals, Food photography, Home cooking, Stress free, Weekend | Tagged , , , , , , , | Leave a comment

Mango Blueberry Smoothie Bowl

My nutribullet is no doubt my favourite kitchen appliance. I used to sit and watch the ad on the tv a few years ago when I used to be awake late at night (long gone are those days!) and think that I wanted to feel like the people in the ad. Playing tennis and jumping around and looking like they hade limitless energy, whoop!

As it was about 3 years ago, the only place to purchase a nutribullet was on the tv show and I had to wait (extremely patiently) for it to be delivered. I was so excited about my purchase that I drove home to the post office to collect it one lunch break.

Admittedly I have been using it pretty much every day since. Back then when I thought the blade was going to need repair I would stress as you were not able to buy a replacement in the shops so I was anxiously hoping that my blades would hold up before I could order another one from ebay so that I would never go a day without being able to make a liquid breakfast if I wanted to.

I have used the bullet for heaps of different things, many smoothies, many smoothie bowls, babaganoush, turning nuts into power and most recently to crush the spices to make chai lattes. If you have considered buying one of these products, but are not too sure, I can honestly say that you won’t regret it. Go and buy one today, you are missing out not having one. Not to mention that these days you can buy them in Coles, Target and Big W – it is so convenient and cheaper than back when I got my 1st one.

My favourite thing to do with it nowadays is to make a delicious smoothie bowl for breakfast on the weekends when I have a little bit of time to be creative as I am not rushing out the door to work.

This is one of my easiest go to recipes:


Mango Blueberry Smoothie Bowl

1 Add 1 cup of frozen mango pieces to your large mixing cup (Aldi’s are the bomb!)
2. Add 1 frozen banana
3. Top with coconut water until you get to the ‘max’ line
4. Blend until all the chunky bits of fruit are pulverized into a thick liquid (take off and shake before re-blending if you find that the mixture is too thick, or add a splash more water).
5. Pour contents of jug into serving bowl and use a teaspoon to flatten out the surface
6. Add fresh blueberries, cacao nibs, chia seeds, shredded coconut and sliced fresh banana
7. Hop, skip and jump around the whole rest of your day as you have put the good stuff in so you have the energy you need to face the world!!

Enjoy xx

Image one: Ready to devour!


Posted in breakfast, Down time, Easy meals, Food photography, Home cooking, Stress free | Tagged , , , , , , , , , | Leave a comment

White Chocolate and Blueberry Tart

Since I made my Chocolate and Raspberry Tart last weekend, I have been thinking about whether I could make a few modifications to the recipe to produce a white chocolate version. I’m not entirely sure at this point whether it is going to be super successful as ‘chocolate’ is much more highly rated by most of us than the white version of the same, but I really wanted to try it, if nothing else to taste the difference and see what turned it turned out like. Visually it looks nice and something different from a traditional chocolate tart, and it’s nice to have a few dessert options up your sleeve as your go to when family and friends are coming around or you are going their place.

So here is my recipe for my White Chocolate and Blueberry Tart, you will need a few hours set aside from start to finish as it takes a while for the filling to set. (Probably best to prepare the day before you dinner party, then you can focus on the rest of your meals whilst dessert is chilling in the fridge).

Note, this recipe and method is almost identical to my Chocolate Tart, the main differences being that you are making a white version, so no cocoa and white chocolate instead of dark chocolate is used.

Serves 8-10 Prep time: 15 minutes

Cook time: 10 minutes Tart in: 25cm x 2.5ccm Fridge time: 2-3 hours

Base Ingredients

1 ½ cups coconut flour
½ tablespoon vanilla essence
¼ cup desiccated coconut
Sprinkle of Himalayan pink rock salt
2 tablespoons honey


Filling Ingredients

400ml coconut milk
250 grams white chocolate bits
½ tablespoon honey
½ tablespoon vanilla essence


Base Method


  1. Grease a 25cm x 2.5cm loose insert tart tin with butter
  2. In a mixing bowl, combine coconut flour, coconut, vanilla essence, salt and honey.
  3. Pour in coconut oil and stir through dry ingredients to fully mix together.
  4. You will notice that the mixture becomes thicker and starts to stick together in parts.
  5. Keep going until all of the base ingredients have a smooth consistency.
  6. Take bowl and pour dry ingredients into greased tart tin.
  7. Use a small shot glass or narrow glass to move the ingredients around covering the base and then working the mix up the sides of the tin.
  8. Once the sides are filled in and the base is uniform in its consistency, put the tin in a pre heated oven at 150 degrees for 10 minutes.
  9. Once cooked, take out and set aside to cool (at least 15 minutes)

    Filling Method

  1. Pour coconut cream into small saucepan and add vanilla essence
  2. Bring to the boil and then add the honey
  3. Pour the chocolate bits into the saucepan and stir continuously whilst turning the heat off.
  4. Keep mixing the ingredients until the chocolate has melted                                                                           


    Tart method

  1. Put the cooled tart base and tin onto a flat square cake board, move it close to the edge of your bench.
  2. Pour the contents of the saucepan into the prepared tart base.
  3. Slide the board off the bench and put in the fridge for 30 minutes initially.
  4. After 30 minutes, take the tart out of the fridge and top with granulated nuts.
  5. Return the tart to the fridge for another hour.
  6. After 1 ½ hours, take the tart out of the fridge and top with fresh blueberries
  7. Return the tart to the fridge and leave to set for another hour.


    To serve

  1. I would recommend serving thin slices of the tart initially as the filling is rich and thick.
  2. Serve with French vanilla ice-cream and frozen blueberries.
  3. The tart will melt if left out of the fridge for too long, so be sure to pop it back in the fridge once all of the plates have been filled.

    Since I made my chocolate tart, I have realised there are actually quite a few options for modifying the recipe slightly  to accommodate vegan friends. Coconut sugar or agave syrup would be the best substitute for the honey and a vegan version of the white chocolate can be found in the healthy aisle of the supermarket or in your nearest health food store.

tart-to-serve

Enjoy!! xx

Posted in Baking, Dessert, Food photography, Home cooking | Tagged , , , , , , , | Leave a comment

Chocolate and Raspberry Tart

It’s Dad’s birthday on Tuesday – Happy Birthday Day! 71 years young! I offered to make the cake for this year and I decided on a Chocolate and Raspberry tart. I have made lemon tarts in the past and often drool over photos of chocolate tarts, but until yesterday making them was foreign to me.

I have a long rectangular tart/flan tin, but as a centre piece and celebration dish I felt the round tart looks best. I spent a little bit of time during the week searching for ideas and inspiration on pinterest again (LOVE, LOVE, LOVE, pinterest) and found a receipe and a look I liked and then played around with my own version from there.

The tart that I most liked the look of is from this website: http://www.bakerita.com/no-bake-raspberry-chocolate-tart-paleo-vegan-gf/ Rachel Conners is the creator of the recipe that inspired me. You should check out her page – Bakertia.com for some amazing desserts!!

So we celebrated Dad’s birthday with burgers and chocolate tart at beautiful Bribie Island, it was great day! We love you Dad, many happy returns! (Also I bet you are glad you can stop bugging me to book my return flight now that is done!).

Serves 8-10
Prep time: 15 minutes
Cook time: 10 minutes
Tart tin: 25cm x 2.5ccm
Fridge time: 2-3 hours

Base Ingredients

1 ½ cups coconut flour
1/4 cup coconut oil
½ tablespoon vanilla essence
¼ cup desiccated coconut
¼ cup cocoa (or cacao powder)
Sprinkle of Himalayan pink rock salt
2 tablespoons honey

Filling Ingredients

400ml coconut milk
250 grams dark chocolate bits
½ tablespoon honey
½ tablespoon vanilla essence


Base Method

  1. Grease a 25cm x 2.5cm loose insert tart tin with butter
  2. In a mixing bowl, combine coconut flour, cocoa, coconut, vanilla essence, salt and honey.
  3. Pour in coconut oil and stir through dry ingredients to fully mix together.
  4. You will notice that the mixture becomes thicker and starts to stick together in parts.
  5. Keep going until all of the base ingredients have a smooth consistency.
  6. Take bowl and pour dry ingredients into greased tart tin.
  7. Use a small shot glass or narrow glass to move the ingredients around covering the base and then working the mix up the sides of the tin.
  8. Once the sides are filled in and the base is uniform in its consistency, put the tin in a pre heated oven at 150 degrees for 10 minutes.
  9. Once cooked, take out and set aside to cool (at least 15 minutes)tart-base-ready-to-bake

    Image one: Making the base

    Filling Method

  1. Pour coconut cream into small saucepan and add vanilla essence
  2. Bring to the boil and then add the honey
  3. Pour the chocolate bits into the saucepan and stir continuously whilst turning the heat off.
  4. Keep mixing the ingredients until the white of the cream can no longer be seen and the liquid has a dark chocolate colour.


    Tart method

  1. Put the cooled tart base and tin onto a flat square cake board, move it close to the edge of your bench.
  2. Pour the contents of the saucepan into the prepared tart base.
  3. Slide the board off the bench and put in the fridge for 30 minutes initially.
  4. After 30 minutes, take the tart out of the fridge and top with granulated nuts.
  5. Return the tart to the fridge for another hour.
  6. After 1 ½ hours, take the tart out of the fridge and top with fresh raspberries
  7. Return the tart to the fridge and leave to set for another hour.tart-topping


    Image two: Decorate with chopped nuts


    To serve

  1. I would recommend serving thin slices of the tart initially as the filling is rich and thick.
  2. Serve with French vanilla ice-cream and frozen raspberries.
  3. The tart will melt if left out of the fridge for too long, so be sure to pop it back in the fridge once all of the plates have been filled.

My version of this tart is not vegan as the dark chocolate bits I used have milk or milk products in them and honey was used in both the base and the filling. If you wanted to make a vegan version, I would look for a vegan friendly dark chocolate and substitute that for the one I have used here and agave syrup has been recommended as a substitute for the honey.

chocolate-tart

Image two: Dig in!!

Enjoy!! xx


Posted in Cooking, Dessert, Food photography, Home cooking | Tagged , , , , , , , , , | 3 Comments

Chickpea Masala (Chana Masala)

chickpea-masala-image-1

Image one: Chickpea Masala (Chana Masala – inspired by Woolworths Fresh Magazine)

This week was a bit hectic. It was one of those weeks where I was thinking ‘ok, I’m going to cook this…’, then I would go looking for a recipe on pinterest or google and go ‘oh, I want to cook that too and that and that and that and that etc’. This all resulted in me using my shopping list app – Out of Milk (you should try it, it is fantastic!), on my phone for the basic stuff but then seriously walking in and out and Aldi, Coles and Woolworths a million times to make sure I had everything so I didn’t have to go out again.

I frustrated even myself and I don’t usually get that annoyed, but one trip as soon as I got back to my car, I thought, hang on, I didn’t get the carrots and I really wanted to make carrot fritters for healthy lunch burgers.

My favourite grocery store is Aldi, it didn’t use to be but I became converted and I love shopping there now, plus there is one just down the street from me, however, I find that I cannot get everything I want from there so I still have to go to Woolworth’s and Coles to get the other stuff. I don’t mind that as the 3 stores are all in a close proximity to each other, however, after getting back to my car for about the tenth time to drop something off, I thought ‘that’s it, I need to plan more when it comes to my meals for the week ahead so I can be better prepared for the shops’.

Working full time with only 2 days to get house stuff, social stuff, life stuff done, means I try and get the household shopping done on a week night, but it’s sometimes more difficult to do it in one hit so that I don’t have to make multiple trips.

Either way, this Chickpea Masala is about the 3rd thing on my list that I wanted to do this weekend and I am glad I got there in the end (1st and 2nd, still in phases on my bench).

The house smells amazing, as soon as I added the curry paste to the pan, I was taken to foreign lands, which was fantastic. Whilst I am not vegan or vegetarian, I have many friends from work who are and I like that their way of life can influence me into trying dishes that I would have found boring when I was younger.

For this week, I found a recipe for this Chickpea Masala in the Woolworth’s Fresh magazine and it looked good, so I thought I would try it. It took less than an hour to make and was not too tricky. I would even give it a go on a week night, but depending on how organised I can be on the weekends, I think that freezing it so it is already done and can be quickly reheated will give me a night off from cooking which whilst I don’t need, I find not enough time for always with work, yoga and everything else there is to achieve in a day. I would definitely cook from scratch every night without doubt as I love it so much and I like a freshly cooked meal, but I am the 1st to admit that I have found myself a couple of times, surrounded my bowls on my kitchen bench elbow deep in some bowl of ingredients on a week night and thought, ‘hmmm, maybe I should have saved this for weekend’, so that all of the cleaning up or merely the thought of it made me run for the hills. (Thank god for dishwashers I say!)

Original recipe was from Woolworth’s Fresh magazine, however, I modified it slightly.

Serves 3-4

 Ingredients

1 x large red onion
1 tablespoon minced garlic
1 tablespoon minced ginger
1/3 cup tikka masala paste
1 x can coconut cream
2 x can chickpeas
1 x can diced tomatoes
6 fresh cherry tomatoes
½ bunch fresh coriander
1 cup cooked basmati rice
Mini pasppadams to serve

Method

  1. Put a splash of olive oil in your frypan and add the diced red onion, fry off for about 2 minutes
  2. Add the garlic and ginger and continue to cook for about 2 mins.
  3. Add the tikka masala paste, fry this off for about 3 mins.
  4. Add the can of diced tomatoes, fry for 1-2 mins.
  5. Add the can coconut cream, stir in very well and ensure that you are happy with the consistency of the curry.
  6. Add the rinsed chickpeas
  7. Put the lid on and bring to the boil for about 2 mins.
  8. Once boiled, turn the stove down, keep the lid on and cook for another 5 minutes.
  9. Taste to make sure the chickpeas are cooking to your liking
  10. Transfer meal into serving dish and garnish with fresh chopped cherry tomatoes and coriander.
  11. Serve with basmati rice and pappadams.

chickpea-masala-image-2

Image two: Dinnertime, ready to eat!

Notes: This meal actually qualifies as both vegan and vegetarian as there is no animal products in it. I highly recommend it as your ‘Meatless Monday’ meal as you can prepare in advance and enjoy without slaving away all day in the kitchen.

Enjoy!! xx

Posted in Uncategorized | Tagged | Leave a comment

Seafood Paella

La, la, la! I don’t know whether I am more excited about my seafood paella or about the fact that as January has come to an end and February has started, I have officially been blogging for a month and I now have 2 months of posts in my archives, whoop!! I feel a sense of achievement in that.

This year I decided to cut down my tv watching at night after work (I wasn’t that addicted but there was still time there I could use) and whilst I have yoga some nights, I still found there are a few nights that I get just a little bit of time that I would prefer to use writing like this than watching something which deactivates my brain as opposed to activating it.

So, this weekend’s cooking. I thought long and hard about what I wanted to do and I referred to a few recipe books as well as going on pinterest and I concluded that I had to do something with seafood. It is hot in Brisvegas and I didn’t want the oven on all weekend, so a gas stove top cooked paella seemed like the way to go. Not to mention, I knew that I could probably get some more mussels from the shop I got my ones from last weekend and I saw some big arse prawns that I just had to do something with, hence, I thought a paella it is. It would also give me an opportunity to play around with saffron which I haven’t done a lot before. I bought both the imitation and the strands as I hadn’t decided yet which was best so I thought ‘get both and decide through experimentation which I like best’.

So whilst, I don’t have a paella pan, like my mum does, (we used it at Christmas as it was quite handy), I do have an excellent sized frypan I use regularly so I decided that would have to do.

Here is the recipe for my Seafood Paella, I insist on the addition of the white wine to the recipe as it helps the flavours integrate and it’s the weekend, so a few drinks here and there help the world go round I say. Again, I went with Jamieson’s white that I had last weekend as it was nice, cold and a good match for the seafood.

This is a relatively easy dish to make. Be cautious to not overcook the seafood and you are away. I feel like the only things I need now are some sangria and a show where those women in the clappy shoes are dancing and the atmosphere is all rowdy and alive.

Fiesta Paella, delicious, if I do say so myself. My paella is also a no eat and drive one in the sense that I kept adding more and more white wine to ensure the rice was fully cooked as I had already added all the stock I had, the flavor it brought was delicious!

Paella ingredients

Olive oil
1 x large red onion diced (I never cook with white onions, I think red has a much better flavor)
Fresh chopped garlic
2 cups vegetable stock
1 cup arborio rice
1 x chorizo sausage finely chopped
10 mussels
6 whopping great big prawns
White wine (amount depends on the night of the week!)
Pinch of paprika
Salt
Pepper

Paella method

  1. Put a splash of oil in the frypan and add the garlic, chorizo, paprika and red onion, fry off for a couple of minutes
  2. Add the stock and saffron threads.
  3. Add the rice
  4. Cook the rice in tasting as you go until it is still a tiny bit crunchy
  5. Add the white wine (I like a sav blanc when cooking)
  6. Add the mussels and cook for approximately 3 minutes with the lid on
  7. Add the prawns, by simply placing on top of the rice mixture.
  8. Put the lid back on and watch for the prawns to cook, as soon as they are fully orange in colour, turn the gas off and remove the lid.
  9. The final few minutes of the seafood cooking, will also allow the rice to finish cooking. Continue to add wine and taste.
  10. Use sliced lemon wedges to serve.

Enjoy xx

Posted in Cooking, Dinner, Easy meals, Food photography, Home cooking, receipes, Weekend | Tagged , , , , , , , , | 1 Comment

Spicy Mussels

mussels-with-wineI made these spicy mussels for dinner last night and the flavour knocked my socks off! I was literally tearing the shell open with both hands to get out the juicy mussel in side and the hit of jalapeno added a lovely change in texture and sensation.

I know that there are a million different recipes that you can choose from when seeking out a good seafood one, what I liked about this was the extra punch from the red curry paste and the ability to sop up the sauce with the polenta chips

Serves: 2 people
Preparation: 30 mins
Cooking time: 30 mins

Parmesan crisp Ingredients

300 grams freshly grated or shaved parmesan
Spray oil

Polenta ingredients

1 cup polenta
1 cup stock (any flavor)
Sprinkle of grated parmesan cheese
Salt and pepper to season

Mussel ingredients

1kg fresh (or frozen, thawed, if can’t get fresh) mussels
Freshly chopped garlic
Olive oil
1 large red onion, finely chopped
1/3 cup chilled white wine
2 tablespoons red curry paste
1 can coconut cream
3 fresh jalapenos
½ punnet cherry tomatoes cut in ½

 Parmesan crisps method

  1. Put a piece of aluminium foil onto a baking tray and spray with oil
  2. Take small pinches of the cheese and start to make small mounds with it on the foil.
  3. Bake in the oven for 10 minutes at 180 degrees
  4. Turn oven off and leave baking tray in there for another 5 minutes so that the heat lightly browns the melted cheese mounds
    Take out of the oven and set aside to garnish the mussel dish when ready

Polenta method

  1. Pour stock into a small saucepan and bring to the boil
  2. Add some freshly ground salt and pepper
  3. Tip the polenta into the pan and stir continuously for 5 minutes. Polenta will absorb the water and start to thicken
  4. Turn the heat down to low and add the grated cheese, continue to stir
  5. Once the polenta has fully absorbed the stock and that cheese has melted into the mix, turn the stove off and remove the pan.
  6. Spray a slice tin with oil and scoop polenta into the slice tin, use the spoon to push it together so you have a nice thick layer you want thick chips, so you don’t have to use the full slice tin area, ½ will work fine
    Sprinkle a little bit more grated cheese on top then put the slice tin into the oven and bake for 10 minutes.

Mussel method

1. Add olive oil to a frypan that has a glass lid on it.
2. Add the freshly chopped garlic and red onion
3. Add the white wine and simmer these ingredients with the lid on for approx. 4    minutes.
4. Add 2 tablespoons red curry paste, simmer again with lid on for approx. 2 minutes
5.Take lid off and pour in can of coconut cream, stir to fully combine ingredients  and mix will look smooth and consistent.
6.Add the cherry tomatoes and jalapenos
7. Add the mussels to the pan and cover with the lid
8. Turn the heat down and let them cook for 4-5 minutes. You will see the shells    beginning to open (discard any after cooking that remain closed)
9.Take the lid off and turn the stove to the lowest setting
10.Spoon the mussels into a serving dish and then pour remaining liquid over mussels

To serve:

  1. Have the mussels in one large bowl, garnish with parmesan crisps.
  2. Put the polenta chips into a small side dish.
  3. Pour a couple of glasses chilled white wine
  4. Have a spare bowl handy for the shells to go into
  5. Serviettes as if you dig in to the mussels with your hands, you will have sticky fingers!

mussels-pic

Enjoy!! xx


Posted in Cooking, Dinner, Food photography, receipes, Vegetables | Tagged , , , , , , , , , , , | Leave a comment